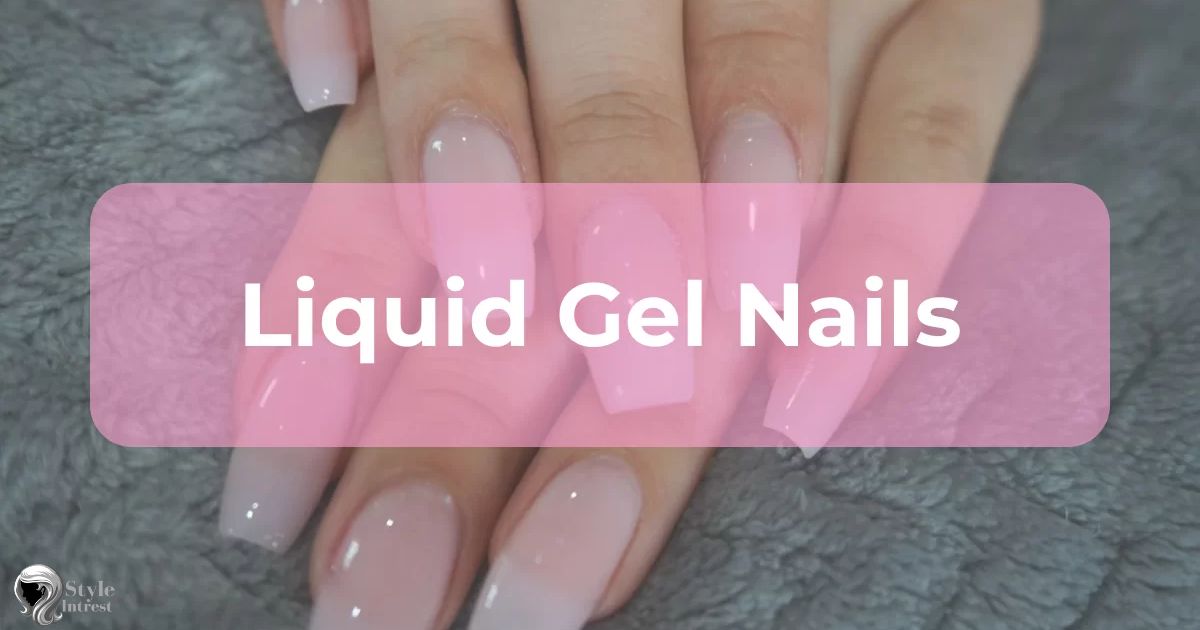
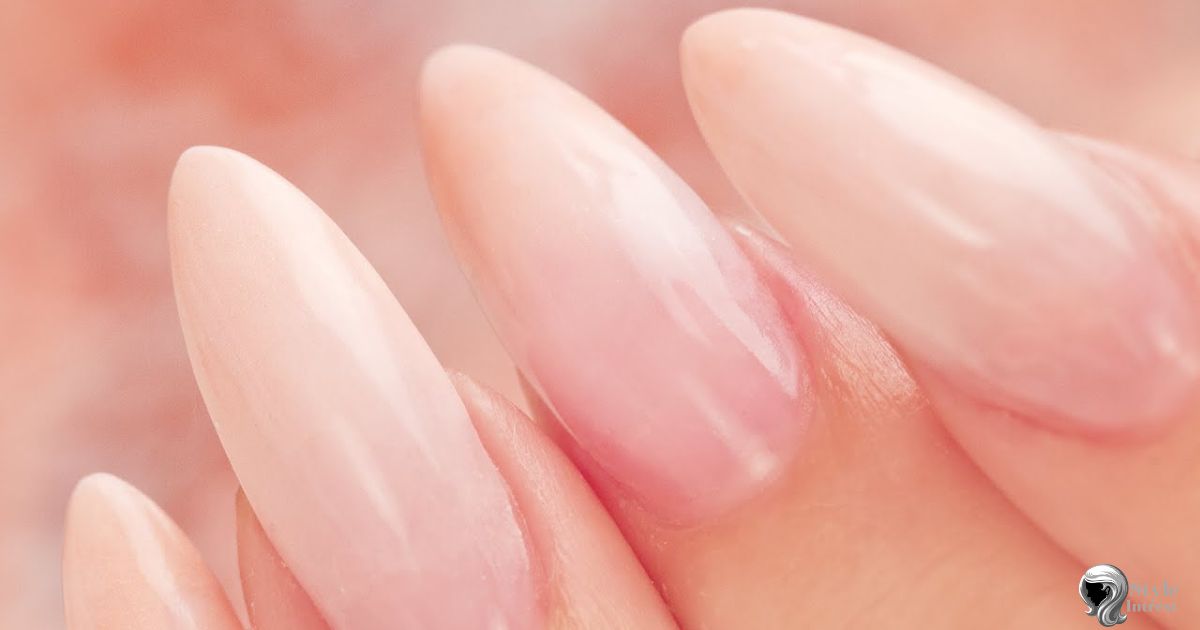
Liquid gel nails are a type of manicure that uses a liquid gel polish. The gel polish is painted onto the nails and cured with a UV or LED light. This hardens the polish into a long lasting manicure.
Liquid gel nails? You may be curious about this new type of manicure trend. Liquid gel polish is becoming increasingly popular compared to traditional nail polish.
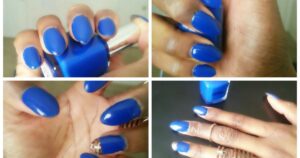
Liquid gel nails can last up to two weeks without chipping unlike regular nail polish that chips within days. The gel polish forms a protective layer over the nails that makes it highly durable. It provides a high shine finish and comes in a wide range of trendy colors.
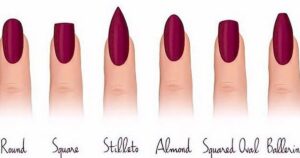
Liquid Gel Nails/ Everything You Need To Know
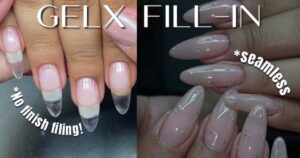
Liquid gel nails provide extra durability and support to natural nails. A gel formulation is used which hardens under LED or UV light. This gel solidifies into a hard yet flexible overlay on nails. It can last for around three to four weeks before needing professional replacement or fill-ins. Removing liquid gel typically requires specialized tools and techniques by nail technicians.
Repairs and new sets cost between $50 to $80 depending on the salon and your location. Choosing liquid gel nails is a wise decision for many people. Some advantages are strengthened nails, extended wear time, and a shiny smooth surface. The gel shields against chips, cracks and peeling far better than regular polish. This makes them suitable for busy lifestyle with activities like sports, crafts or chores.
What are liquid gel nails?

Liquid gel nails are a type of manicure that uses a gel polish rather than traditional nail polish. The gel polish is painted onto the nails and cured with a UV or LED light to harden it into a long-lasting manicure. Gel polishes dry hard and resist chips, cracks, and breaks better than regular nail polish.
Liquid gel polishes come in bottles and are painted onto the nails using a small brush. Multiple thin coats are applied and cured between each coat. This process allows the gel to fully harden and bond tightly to the natural nails providing durability and a shiny finish.
How Long Do Liquid Gel Nails Last?
Liquid gel manicures can potentially last up to two to three weeks without chipping or scratches appearing on the nails. Because the gel polish hardens with light activation, it forms a very hard yet flexible coating over the nails. This protective layer makes the manicure highly resistant to chips, cracks or damage from water exposure.
Most people find that with regular wear and care, their gel manicure stays looking fresh for 10-14 days. After that time minor nicks or imperfections may develop but the color and shine will still look newly applied. With proper removal the nails under the gel are usually not damaged or weakened.
How Are Liquid Gel Nails Applied?
Getting liquid gel nails applied takes one to two hours as each coat needs time to cure under the lamp. The natural nails are prepped, filed and cleaned to remove any oils. A base coat is brushed on and cured then one or two thin coats of color are applied, cured and shaped after each.
A high-quality top coat is brushed over the color and cured for maximum shine and protection. During the process gel polishes bond to each other and the nail for exceptionally long wear. Most salons recommend soaking off gel polish every 2-3 weeks for the health of the natural nails.
Considerations with Liquid Gel Nails
While gel manicures last much longer than regular polish some considerations should be made. Removal does require soaking the nails in acetone which can weaken or damage the nails if over-soaked. Using strengtheners and taking breaks between gels is recommended.
Allergic reactions are rare but possible if one has nail product sensitivities. The curing process uses UV or LED lights which some worry about overexposure to nails although research shows it to be safe.
| Consideration | Detail |
| Durability | Lasts 2-3 weeks before redone |
| Application Time | 1-2 hours for full set |
| Removal | Acetone soak required |
| Cost | $25-45 per full set on average |
| Upkeep | Fills every 2-3 weeks $15-25 |
Liquid gel manicures give nails a high shine, salon perfect look and feel for an extended period. With some understanding of the process and needs for removal it provides gorgeous low maintenance nails. Some sacrifice nails’ breathability for a few weeks at a time but for most it’s a small trade off for flawless looking nails. With proper care, liquid gels can enhance nails without damage.
Application Process of Liquid Gel Nails
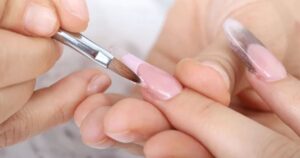
The application of liquid gel nails allows you to achieve long lasting professional looking nails at home. It may seem complex but following simple steps carefully gets great results. To start, gather needed supplies.
Step 1: Prep Your Nails for Liquid Gel Application
Getting your nails ready is crucial for a flawless gel application. Begin by shaping your nails with a file and gently pushing back your cuticles. Buff the surface of your nails to remove any natural oils that may hinder gel adherence. Cleanse your nails with a nail cleanser or rubbing alcohol to ensure a clean canvas for the liquid gel.
Step 2: Apply Protein Bond
Protein bond acts as a primer, enhancing the adhesion of the gel to your nails. Apply a thin layer of protein bond to each nail, making sure to avoid the skin. This step creates a strong bond between your natural nail and the liquid gel, preventing chipping or peeling. The protein bond is a key component in the longevity of your gel nails, providing an extra layer of protection and durability.
Step 3: Apply Base Coat
The base coat is the foundation of your gel manicure. Apply a thin layer evenly across each nail, ensuring full coverage without touching the cuticles. The base coat not only provides a smooth surface for the color gel but also acts as a protective layer, preventing staining and damage to your natural nails.
Step 4: Cure the Base Coat
Curing the base coat is a crucial step in the gel application process. Use a UV or LED lamp to cure the base coat according to the product’s instructions. This step solidifies the base coat, ensuring it’s fully set and ready for the next layer. Curing the base coat under a lamp is a quick and efficient process that contributes to the overall durability and longevity of your gel nails.
Step 5: Apply Color Liquid Gel
Choosing your desired color, apply a thin layer of liquid gel evenly on each nail. Take your time to ensure a neat and precise application, avoiding contact with the cuticles and skin. The color layer adds vibrancy to your nails, allowing you to express your personal style. Applying the color liquid gel is where your creativity comes into play.
Step 6: Cure the Color Layer
Once the color is applied, cure your nails under the UV or LED lamp. Follow the product’s recommended curing time to ensure the color gel sets properly. Curing solidifies the color layer, preventing smudging and ensuring a long-lasting, salon-quality finish. Curing the color layer is a crucial step in the gel application process, contributing to the durability and resilience of your manicure.
Step 7: File and Even Out the Color Layer
After curing, use a fine nail file to shape and even out the color layer. This step allows you to refine the shape of your nails and smooth any uneven surfaces. Be gentle to avoid damaging the layers you’ve applied. Filing and shaping the color layer is a key element in achieving a polished and professional look.
Step 8: Remove Sticky Residue
After filing, wipe away any sticky residue with a lint-free wipe soaked in rubbing alcohol. This step cleans the nails and removes any leftover residue from the curing process, leaving your nails clean and ready for the final steps. Removing sticky residue is a simple yet essential step in the liquid gel nail application process. It ensures a clean and glossy finish, enhancing the overall appearance of your manicure.
Step 9: Apply Top Coat
The top coat is the finishing touch that seals and protects your gel manicure. Apply a thin layer evenly on each nail, covering the entire surface. The top coat adds shine, durability, and an extra layer of protection to your liquid gel nails. Applying the top coat is the final step in achieving a glossy and professional-looking gel manicure.
Step 10: Apply Cuticle Oil
Complete your liquid gel nail experience by applying cuticle oil. Gently massage the oil into your cuticles and surrounding skin to hydrate and nourish. This step adds a final touch of care to your manicure, promoting healthy and well-maintained nails. Applying cuticle oil is a luxurious and pampering step that ensures your nails not only look fantastic but also receive the care they deserve.
How to Properly Remove Liquid Gel Nails
Removing liquid gel nails at home requires a gentle and precise process. Begin by filing down the top layer of the gel to break the seal. Soak your nails in acetone for about 15-20 minutes, using foil wraps to secure the soaked cotton balls on each nail. Gently scrape off the softened gel with a cuticle pusher, repeating the soaking process if necessary.
Finally, moisturize your nails and cuticles with oil to replenish moisture lost during the removal process. Proper removal of liquid gel nails is essential to prevent damage to your natural nails. Avoid forcefully peeling or picking at the gel, as this can lead to thinning and weakening of the natural nail bed.
Differences Between Liquid Gel Nails and Acrylic Nails
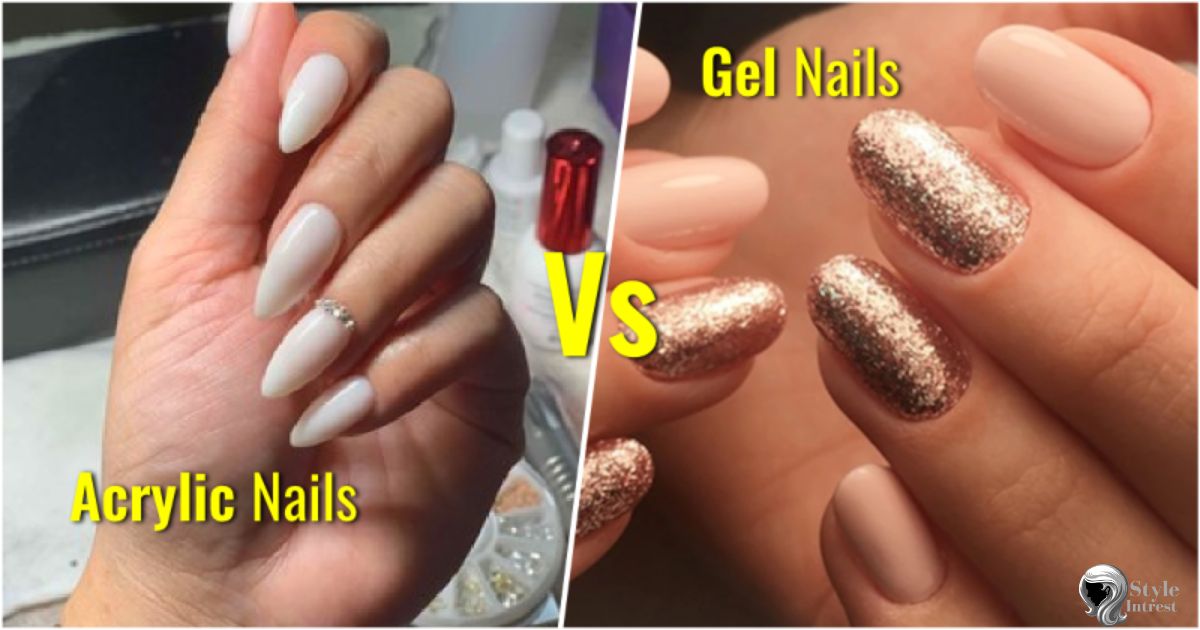
While both liquid gel and acrylic nails are popular artificial nail enhancements, they differ in composition and application. Liquid gel nails are a premixed gel that comes in a bottle, applied directly to the nail and cured under a UV or LED lamp. On the other hand, acrylic nails involve a liquid monomer and a powder polymer mixture, creating a paste applied to the nails and shaped before drying.
The main distinction lies in the application process and the materials used. Liquid gel nails tend to be more flexible and lightweight, providing a natural look and feel. Acrylic nails, however, can be more durable but may feel heavier and rigid. Choosing between the two depends on personal preferences and the desired outcome.
Pros and Cons of Liquid Gel Nails vs. Acrylic Nails
| Aspect | Liquid Gel Nails | Acrylic Nails |
| Application | Easy application with premixed gel. | Requires a skilled technician for precise application. |
| Appearance | Natural and lightweight. | Durable but may appear thicker and less natural. |
| Durability | Less prone to lifting and chipping. | Known for durability but can lift or break if not done well. |
| Maintenance | Minimal fills needed, less maintenance. | Regular fills are necessary for a polished look. |
| Removal | Easier removal process at home. | Requires professional removal to avoid damage. |
| Odor | Minimal odor during application. | Strong odor from the liquid monomer. |
| Flexibility | More flexible and forgiving. | Can be rigid, especially if applied thickly. |
| Cost | Typically higher cost for initial application. | Initial application cost is often lower. |
Understanding the pros and cons of liquid gel nails versus acrylic nails helps individuals make informed decisions based on their lifestyle, preferences, and nail care routine.
Liquid Gel Nails Cost: What to Expect
The cost of liquid gel nails can vary depending on factors such as location, salon reputation, and the complexity of the design. On average, a basic full set of liquid gel nails can range from $40 to $80. Additional costs may include nail art, intricate designs, or special finishes, which can increase the total price.
It’s essential to consider the long-term benefits and maintenance requirements when evaluating the cost of liquid gel nails. While the initial investment may be higher than traditional manicures, the durability and aesthetic appeal often justify the expense for those seeking a long-lasting and flawless finish.
Benefits of Liquid Gel Nails
Liquid gel nails have several advantages over other types of manicures, including Acrylic Nails Cost. They provide nails with a long-lasting, glossy shine and smooth finish. The main benefits of liquid gel nails include:
- Lasts 2-3 weeks before needing a refill or new application
- Resists chipping, cracks, and breaks much better than regular nail polish
- Protects nails from water damage and activities like household chores
- Nails always look polished and freshly manicured for an extended period
- Application process hardens the polish into a durable shield for nails
- Gel polishes come in a wide range of trendy colors and designs
Who Should Opt For Liquid Gel Nails?
Liquid gel nails are an excellent choice for individuals seeking a natural and lightweight alternative to traditional acrylic nails. They are suitable for those with a preference for a more flexible and comfortable feel, making them ideal for daily activities without compromising aesthetics. If you desire a durable and low-maintenance manicure with a wide range of design possibilities, liquid gel nails could be the perfect option for you.
Choosing between liquid gel nails and other nail enhancements ultimately depends on individual preferences, lifestyle, and desired outcomes. Whether you’re a busy professional or someone who loves experimenting with nail art, liquid gel nails offer a versatile and attractive solution for beautiful, long-lasting manicures.
Liquid gel nails removal
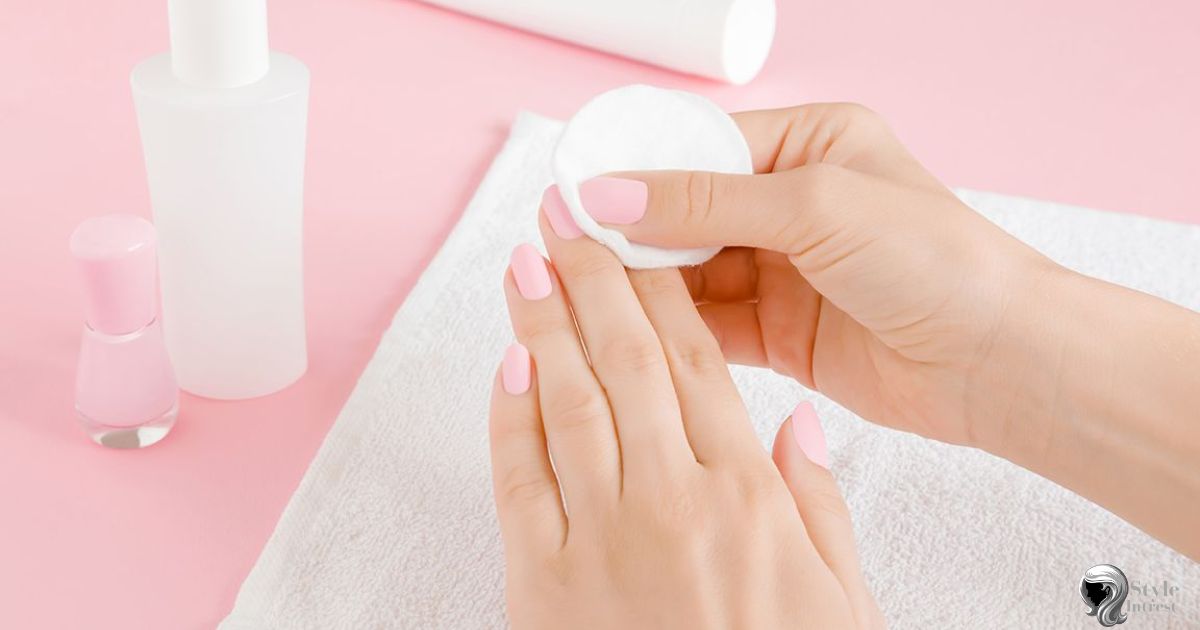
Removing liquid gel nails requires soaking the nails in acetone for 5-10 minutes. Acetone works to slowly dissolve the gel polish and bonding layers. As the nails soak, the polish and layers will gradually soften and detach from the natural nail. After soaking time, the nails can gently be pushed back to pop off the whole gel enhancement in one piece.
After removal, it’s best to use cuticle oil to condition the nails. The soak time in acetone can dry out the nails and cuticles. Massage a few drops of oil around each nail and cuticle area. This helps replenish moisture and keep nails flexible after relaxing in acetone. Over time, the natural nails will grow out to their normal length free of any gel residue or damage from the soak.
How Long Do Liquid Gel Nails Last?
Liquid gel nails can potentially last for 2-3 weeks before they need to be removed or filled in. The gel polish hardens with a UV or LED light and forms a hard protective layer on top of the nails. This protective coating makes the manicure very durable and long-lasting.
Most people find that with regular daily use, their gel manicure maintains a fresh, polished look and feels smooth for around 10-14 days. After this time, very small chips or imperfections may start to appear on some nails. The color and shine still looks newly applied even after 2 weeks of wear. With gentle care and cleaning, the manicure can often last comfortably close to the full 2-3 week duration before it needs to be replaced.
FAQ’s
Are liquid gel nails better than acrylic?
Liquid gel nails are considered better than acrylic nails as they are thinner, more flexible and cause less damage to natural nails.
Are liquid gel nails better than powder gel nails?
Liquid gel nails are less damaging than powder gel nails because the application process does not involve sprinkling hardening powder onto nails.
What is the difference between liquid gel and regular gel nails?
The main difference is that liquid gel nails use a liquid monomer solution during application instead of a powder like regular gel nails.
Conclusion
Liquid gel nails are a popular nail art option that provides long-lasting polish and protection for natural nails. The application process involves brushing on colored polishes and bonding agents that are cured with light for durability.
Lasting up to three weeks between fills, gel manicures stay shiny and intact through daily activities when applied correctly. Overall, liquid gel nails can deliver salon quality results with benefits over other enhancement types. Key advantages include flexibility, minimal damage risk and a glossy finish that maintains an just-done look for an extended period.
With basic supplies and following application steps, flawless professional level nails are achievable at home through this method. Liquid gel polishes give busy women a low maintenance beauty option that can stretch weeks between appointments.